Run
Introduction
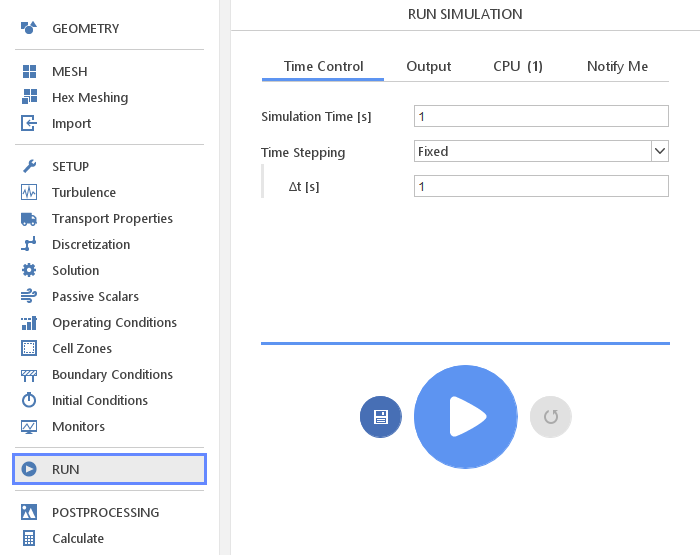
In the Run panel you can start the actual simulation. This panel has two main sections. The top section contains inputs for parameters of the execution process. The bottom section contains buttons that can save, start or reset the actual simulation.
Execution Parameters
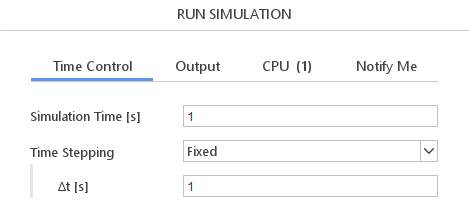
Execution parameters are grouped into four tabs:
- Time Control
- Output
- CPU
- Notify Me
Time Control
In the Time Control tab, there are inputs for you to specify, depending on the solver type:
- Steady State
- Transient
Steady State
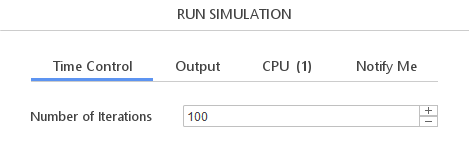
In the case of steady state simulations, you need to specify the maximal number of iterations. If the convergence criteria are reached before this iteration, the simulation will also stop.
Transient
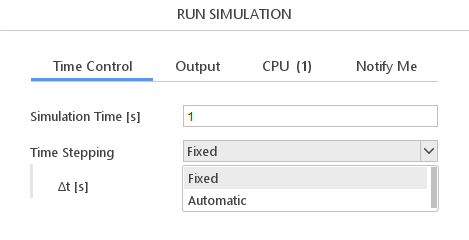
In the case of transient simulations, you need to specify the simulation time and time step parameters.
- Simulation Time - time at which the simulation should stop.
- Time Stepping - time increment at which the simulation progresses. This value should be very carefully chosen based on the time scale of the process you want to simulate and the mesh size.
Fixed
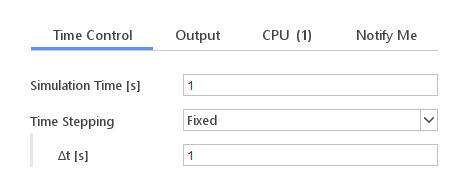
Fixed time stepping requires defining a constant time step.
Fixed time stepping options:
- \(\Delta t [s]\) - time step size
Automatic
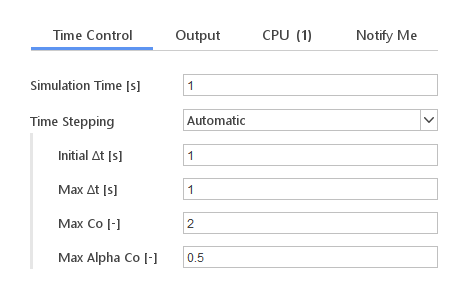
Most transient solvers allow for automatic time stepping. This is a very useful option since in most cases it is very difficult to select an appropriate time step value that will be optimal for the entire simulation. Usually, you would like to start your simulation with a relatively small time step for stability and later increase it to speed up the simulation.
The Automatic time stepping option will enable a mechanism that will automatically select the time step size based on the current state of the solution. It allows you to add certain constraints on the time step size to avoid divergence when the algorithm erroneously selects too high a time step.
Automatic time stepping options:
- \(Initial \Delta t [s]\) - time step size at the start of the simulation
- \(Max \Delta t [s]\) - maximum allowed time step size
- \(Max Co [-]\) - maximum allowed Courant number
- \(Max Alpha Co [-]\) - maximum allowed Courant number of the phase interface (multi-phase solvers only)
Output
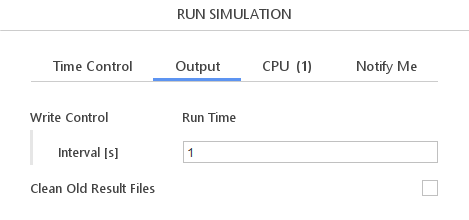
The Output section contains options for various aspects of saving results to the disk.
Output Control Options:
- Write Control - strategy for frequency of writing results to the disk (Iteration for steady state simulations and Run Time for transient).
- Interval - result write interval for strategy under Write Control - number of iterations for steady state simulation and seconds for transient
- Clean Old Result Files - option that enables automatic removal of old result sets if the number of result sets exceeds the specified amount

The Clean Old Result Files option protects you from filling up your disk with result files you do not actually need. It will automatically remove old result sets if the accumulated number of result sets exceeds the specified number.
When Clean Old Result Files is enabled, you need to specify the Maximum Number of Files that should be kept on disk.
CPU
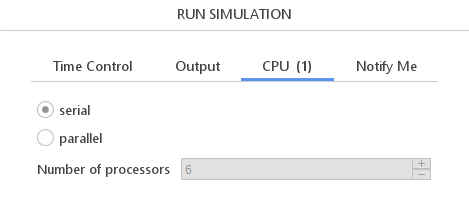
In the CPU tab you can define whether you want the simulation to run in serial or in parallel on multiple processors.
Parallel Execution
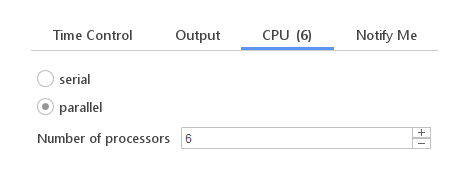
When you want your simulation to run faster, you can enable execution in parallel. With this option enabled, you will have to define the Number of processors to use for the calculation. This value should usually be set to the number of physical cores available on your computer. The number of selected processors will be displayed in the tab label, so that it is visible from all other tabs.
Notify Me
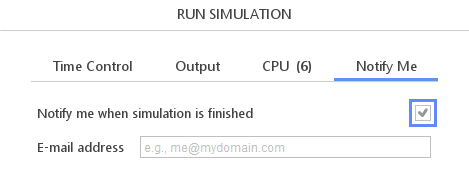
In the Notify Me tab you can tell the system to send you an email when the simulation is finished. This option is especially useful when you are running very long simulations taking hours or even days to finish.
In order to receive a notification, you need to input a valid email address. The system will check whether your input is a formally correct email address and only when you see a green tick mark, the notification will be activated.
Execution Buttons

There are three buttons controlling the simulation process:
- Write Setup - causes the current state of the system to be written to disk. This option is usually used by advanced users who want to check the setup files or modify them and run OpenFOAM solvers manually from the command line.
- Run Simulation - starts the simulation process or continues the simulation if it was stopped or interrupted. When starting the simulation, the system will also perform the Write Setup operation.
- Reset Simulation - when the simulation finished or was interrupted, this button will remove all the result files.
Restoring Results

When you click Reset Simulation, current result files will be removed. However, if you performed this operation by accident, you can click the Restore button, at the bottom of the panel, to bring back the removed files.